

Installing a Crawl Space Vapor Barrier: Essential Tips and Steps
A crawl space vapor barrier is a protective layer installed on the ground surface of a crawl space beneath a building. It's typically made of durable plastic like polyethylene and prevents moisture from seeping into the crawl space from the ground.
How Do Vapor Barriers Work?
Vapor barriers work by creating a barrier that prevents moisture from passing through it. In a crawl space, moisture can seep through the soil and into the space, leading to issues like mold growth, wood rot, and structural damage. The vapor barrier acts as a shield, blocking this moisture from entering the crawl space and thus helping to maintain a dry and healthy environment.
Is a Vapor Barrier Really Necessary For Your Crawl Space and Why?
Without a vapor barrier, moisture can accumulate in the crawl space, leading to a host of problems as mentioned earlier. These issues not only affect the structural integrity of the building but can also impact indoor air quality and the health of occupants.
Additionally, a properly installed vapor barrier can also help improve energy efficiency by reducing the amount of moisture that needs to be heated or cooled, thus lowering energy costs. Overall, investing in a vapor barrier for your crawl space can help protect your home and ensure a healthier living environment.
Understanding Moisture Issues in Crawl Spaces
Moisture problems in crawl spaces can arise from various sources and can have significant consequences if left unaddressed.
Common Causes of Moisture in Crawl Spaces
- Ground Moisture: Soil beneath the building can release moisture vapor into the crawl space through capillary action, especially in areas with high groundwater levels or poor drainage.
- Rainwater: Improperly directed or clogged gutters, as well as inadequate grading around the foundation, can lead to rainwater pooling around the crawl space perimeter, increasing moisture infiltration.
- Plumbing Leaks: Leaky pipes or plumbing fixtures within the crawl space can introduce significant moisture, exacerbating humidity levels.
- Condensation: Temperature differentials between the crawl space and the outside environment, combined with high humidity levels, can cause condensation on surfaces, contributing to moisture issues.
- Inadequate Ventilation: Poor ventilation can trap moisture within the crawl space, preventing proper airflow and exacerbating humidity levels.
Impact of Moisture on Structural Integrity and Indoor Air Quality
- Structural Damage: Excess moisture in crawl spaces can lead to wood rot, decay, and deterioration of structural components such as floor joists, beams, and subflooring. This compromises the structural integrity of the building and can necessitate costly repairs.
- Mold and Mildew Growth: Moisture provides an ideal environment for mold and mildew to flourish. Mold growth not only damages building materials but also poses health risks to occupants, triggering allergies, respiratory issues, and other health problems.
- Pest Infestations: Damp crawl spaces attract pests like termites, ants, rodents, and insects, which can further damage structural elements and compromise indoor air quality.
- Indoor Air Quality (IAQ) Concerns: Moisture in crawl spaces can lead to musty odors, increased humidity levels, and the circulation of airborne mold spores and allergens throughout the building. Poor IAQ can cause respiratory issues and exacerbate existing health conditions in occupants.
Benefits of Installing a Crawl Space Vapor Barrier
Installing a crawl space vapor barrier offers several advantages, ranging from improved moisture control to enhanced energy efficiency and structural protection.
Improved Moisture Control and Prevention of Mold Growth
- Moisture Barrier: A vapor barrier creates a physical barrier between the ground and the crawl space, preventing moisture from seeping through the soil and into the enclosed area.
- Reduced Humidity: By blocking moisture infiltration, the vapor barrier helps maintain lower humidity levels in the crawl space, reducing the risk of condensation and mold growth on structural surfaces.
Enhanced Energy Efficiency and Reduced Utility Costs
- Temperature Regulation: By minimizing moisture intrusion, the water vapor barrier helps stabilize temperature levels in the crawl space, reducing the workload on HVAC systems to maintain desired indoor temperatures.
- Improved Insulation Performance: A dry crawl space with proper moisture control enhances the effectiveness of insulation materials, allowing them to perform optimally and reducing heat loss or gain through the floor above.
- Lower Energy Consumption: With improved insulation performance and reduced HVAC workload, homeowners can experience lower energy consumption and utility bills over time.
Protection of Structural Components from Moisture-Related Damage
- Prevention of Wood Rot and Decay: By keeping the crawl space dry, the vapor barrier protects wooden structural elements such as floor joists, beams, and subflooring from moisture-related issues like fungus, rot, decay, and deterioration.
- Prolonged Lifespan of Building Materials: By mitigating moisture damage, the vapor barrier helps extend the lifespan of structural components and building materials, reducing the need for costly repairs or replacements.
Types of Crawl Space Vapor Barriers
There are several types of materials used for crawl space vapor barriers, each with its own characteristics in terms of effectiveness, durability, and cost.
Plastic Sheeting
- Material: Plastic sheeting, typically made of polyethylene, is the most common type of vapor barrier used in crawl spaces.
- Effectiveness: Plastic sheeting effectively blocks moisture vapor from penetrating into the crawl space, providing a reliable moisture barrier.
- Durability: High-quality plastic sheeting is durable and resistant to tears, punctures, and degradation from moisture exposure.
- Cost: Plastic sheeting is relatively affordable compared to other types of vapor barriers, making it a cost-effective option for crawl space encapsulation.
Foil-Faced Insulation
- Material: Foil-faced insulation consists of a layer of foil laminated to rigid foam board insulation.
- Effectiveness: Foil-faced insulation serves dual purposes as both a thermal insulator and a vapor barrier, effectively reducing heat transfer and blocking moisture infiltration.
- Durability: Foil-faced insulation is durable and resistant to moisture damage, but it may not be as robust as plastic sheeting in terms of tear resistance.
- Cost: Foil-faced insulation tends to be more expensive than plain plastic sheeting due to the added thermal insulation properties.
Woven Polyethylene Fabric
- Material: Woven polyethylene fabric is a reinforced plastic material with a woven construction for added strength and durability.
- Effectiveness: Woven polyethylene fabric provides a strong barrier against moisture vapor while offering greater tear resistance compared to standard plastic sheeting.
- Durability: Woven polyethylene fabric is highly durable and resistant to punctures, tears, and degradation from exposure to moisture and UV radiation.
- Cost: Woven polyethylene fabric typically falls between plain plastic sheeting and foil-faced insulation in terms of cost, offering a balance of effectiveness and affordability.
Comparison of Effectiveness, Durability, and Cost
- Effectiveness: All three types of crawl space vapor barriers are effective at blocking moisture vapor, but foil-faced insulation may offer additional thermal insulation benefits.
- Durability: Woven polyethylene fabric tends to be the most durable option, followed by plastic sheeting and foil-faced insulation.
- Cost: Plastic sheeting is the most cost-effective option, followed by woven polyethylene fabric and foil-faced insulation, which is typically the most expensive due to its added insulation properties.
Ultimately, the choice of crawl space vapor barrier depends on factors such as budget, desired durability, and insulation requirements. It's essential to select a vapor barrier that best meets the specific needs of your crawl space environment.
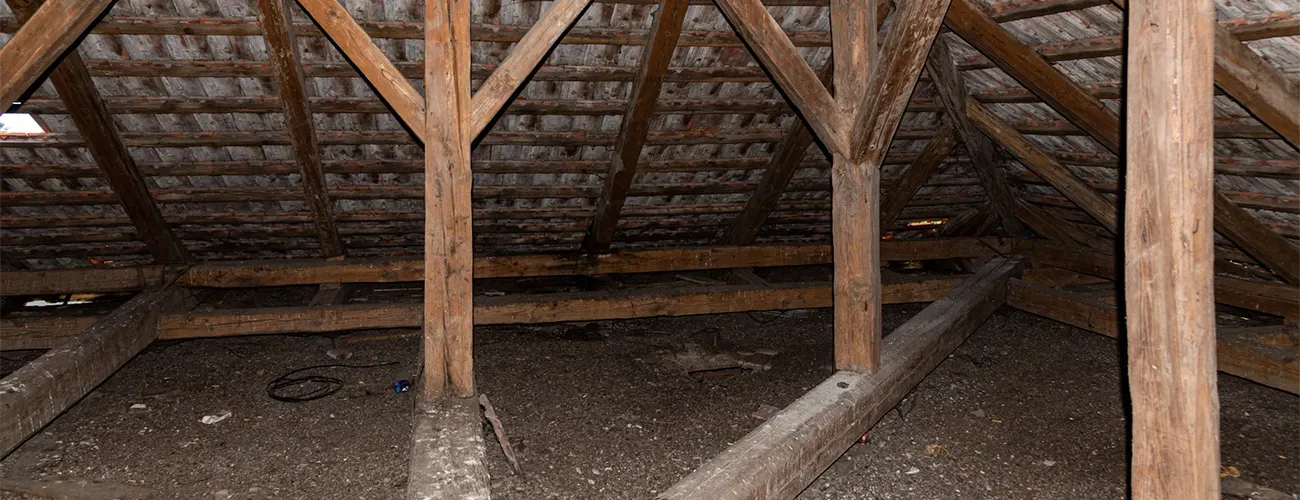
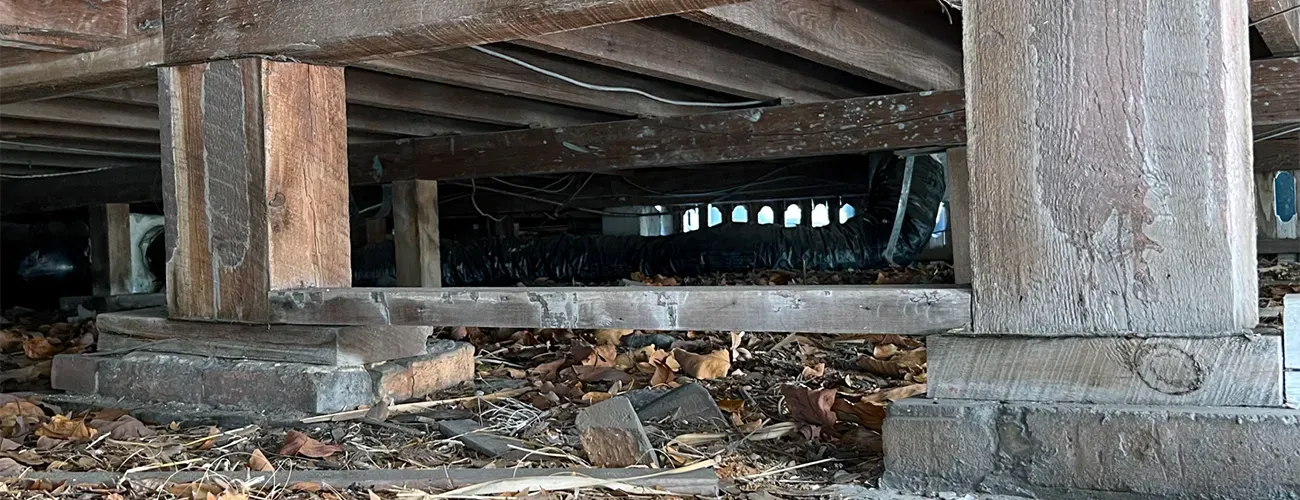
Assessing Your Crawl Space Before You Begin
Before starting a crawl space encapsulation project, it's essential to assess the current condition of your crawl space to identify existing moisture issues and potential problem areas.
Steps to Evaluate the Current Condition of Your Crawl Space
- Inspect for Standing Water: Check for any signs of standing water or pooling moisture in the crawl space. This could indicate drainage problems or high groundwater levels.
- Examine Structural Components: Inspect wooden structural elements such as floor joists, beams, and subflooring for signs of moisture damage, including rot, decay, and mold growth.
- Check for Condensation: Look for evidence of condensation on surfaces within the crawl space, which may indicate high humidity levels and inadequate ventilation.
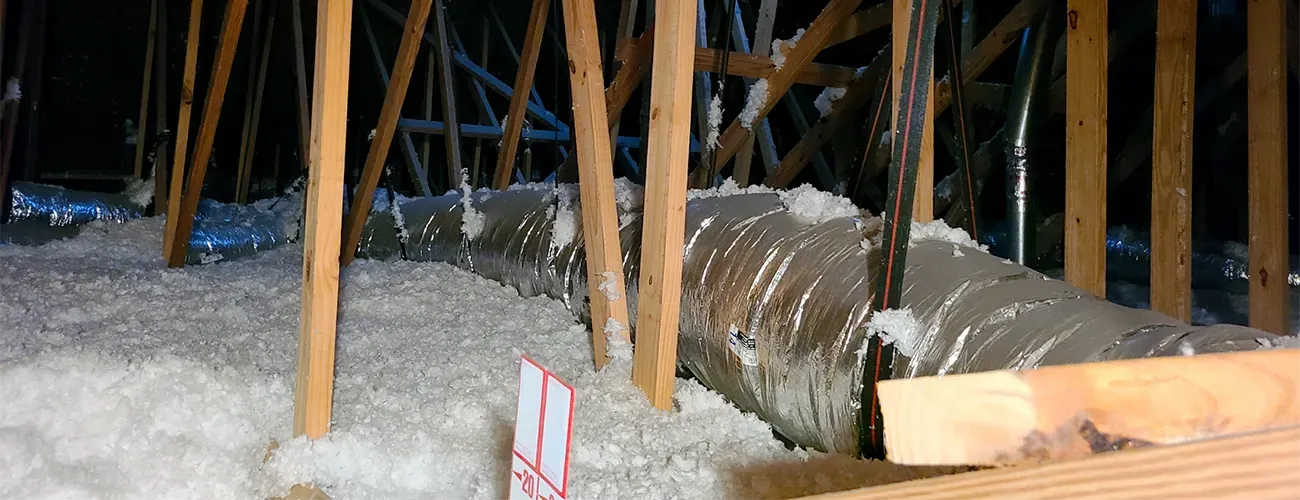
- Inspect Insulation: Assess the condition of existing insulation materials for signs of moisture saturation or damage. Wet or deteriorating insulation can compromise its effectiveness and contribute to moisture problems.
- Check for Pest Infestations: Look for signs of pest infestations, such as termite tunnels, rodent droppings, or insect nests. Pests are attracted to damp environments and can exacerbate moisture issues.
- Evaluate Ventilation: Assess the ventilation system in the crawl space to ensure proper airflow and ventilation. Inadequate ventilation can trap moisture and contribute to humidity buildup.
Identifying Existing Moisture Issues and Potential Problem Areas
- High Humidity Levels: Moisture meters or hygrometers can be used to measure humidity levels in the crawl space and identify areas with excessive moisture.
- Water Stains: Look for water stains on surfaces or discoloration of structural components, indicating past or ongoing moisture intrusion.
- Musty Odors: Musty or moldy odors are often indicative of mold growth or microbial activity due to excess moisture in the crawl space.
- Visible Mold Growth: Inspect surfaces for visible mold growth, including walls, floors, insulation, and wooden structural elements. Mold thrives in damp environments and can pose health risks to occupants.
Necessary Tools and Materials for Installation
- Vapor Barrier Material: Select the appropriate type and size of vapor barrier material for your crawl space, such as plastic sheeting, foil-faced insulation, or woven polyethylene fabric.
- Utility Knife: Used for cutting the vapor barrier material to size and trimming excess material during installation.
- Measuring Tape: Essential for accurately measuring the dimensions of the crawl space and cutting the vapor barrier material to fit.
- Adhesive Tape or Sealant: Used to seal seams, joints, and penetrations in the vapor barrier to create a continuous moisture barrier.
- Fasteners: Depending on the type of vapor barrier material, you may need fasteners such as staples, nails, or adhesive anchors to secure the material in place.
- Protective Gear: Wear appropriate safety gear, including gloves, goggles, and a respirator, to protect against potential hazards such as dust, mold spores, and insulation fibers.
Safety Precautions to Consider Before Starting the Project
- Proper Ventilation: Ensure adequate ventilation in the crawl space to prevent the buildup of harmful gases and improve air quality during the installation process.
- Secure Ladders and Access Points: Safely secure ladders and access points to the crawl space to prevent accidents or falls while working in confined spaces.
- Protective Gear: Wear protective gear, including gloves, goggles, and a respirator, to shield against potential hazards such as dust, mold spores, and insulation fibers.
- Electrical Safety: If working near electrical fixtures or wiring, take precautions to avoid electrical hazards and consider turning off power to the crawl space as needed.
- Watch for Wildlife: Be aware of the potential presence of pests or wildlife in the crawl space and take appropriate precautions to minimize encounters during the installation process.
Crawl Space Vapor Barrier Installation Process
Installing a vapor barrier in your crawl space involves thorough preparation and precise installation to effectively control moisture and protect your home's structural integrity.
Preparing the Crawl Space
Clearing Debris and Cleaning the Area
- Remove Debris: Clear out any debris, including rocks, branches, and other objects, from the crawl space to create a clean working environment.
- Sweep and Vacuum: Use a broom or vacuum cleaner to remove dust, dirt, and loose particles from the crawl space floor and surfaces.
- Inspect for Mold and Mildew: Check for signs of mold and mildew growth on surfaces and address any existing issues before proceeding with the installation.
Addressing Any Existing Moisture Problems
- Fix Leaks: Repair any plumbing leaks, damaged pipes, or water intrusion points in the crawl space to prevent ongoing moisture issues.
- Address Drainage Issues: Improve drainage around the perimeter of the crawl space to divert rainwater away from the foundation and prevent standing water accumulation.
- Install Sump Pump: If necessary, consider installing a sump pump or drainage system to effectively manage excess groundwater and prevent flooding.
Installing the Vapor Barrier
Step-by-Step Guide to Laying Down the Barrier
- Measure and Cut: Measure the dimensions of the crawl space floor and cut the vapor barrier material to size, leaving some excess material to overlap the walls and seams.
- Position the Barrier: Roll out the vapor barrier material across the crawl space floor, ensuring full coverage from wall to wall. Overlap multiple sheets of material if necessary, leaving no gaps.
- Secure the Edges: Secure the edges of the vapor barrier to the crawl space walls using adhesive tape, sealant, or mechanical fasteners such as staples or nails. Ensure a tight seal to prevent moisture intrusion.
- Overlap Seams: If using multiple sheets of vapor barrier material, overlap the seams by several inches and secure them together using adhesive tape or sealant. Press down firmly to create a watertight seal.
- Trim Excess Material: Use a utility knife to trim any excess material along the edges and seams of the vapor barrier, ensuring a neat installation.
- Inspect and Test: Once the vapor barrier is installed, inspect the entire crawl space for any gaps, tears, or areas of concern. Test the effectiveness of the barrier by monitoring humidity levels and moisture accumulation over time.
Maintenance Tips and Best Practices
Proper maintenance of your crawl space vapor barrier is essential for ensuring optimal performance and longevity. Regular inspections and proactive measures can help prevent moisture intrusion and preserve the integrity of your home's foundation and structural components.
Regular Inspections
- Check for Tears and Punctures: Conduct visual inspections of the vapor barrier surface regularly to identify any tears, punctures, or damage that may compromise its effectiveness.
- Inspect Seams and Edges: Pay special attention to seams, edges, and overlaps of the vapor barrier material. Ensure that they are securely sealed and free from gaps or openings that could allow moisture to penetrate.
- Look for Signs of Moisture Intrusion: Monitor the crawl space for any signs of moisture intrusion, such as water stains, mold growth, or musty odors. Address any issues promptly to prevent further damage.
- Examine Insulation and Structural Components: Inspect insulation materials and wooden structural elements for signs of moisture damage, decay, or pest infestations. Replace or repair any compromised materials as needed.
Recommended Maintenance Schedule
- Quarterly Inspections: Conduct thorough inspections of the crawl space vapor barrier every three months to check for tears, punctures, and signs of moisture intrusion. Address any issues promptly to prevent worsening conditions.
- Seasonal Maintenance: Perform seasonal maintenance tasks, such as clearing debris from crawl space vents, ensuring proper drainage around the perimeter, and checking sump pumps or drainage systems for functionality.
- Annual Maintenance: Schedule an annual maintenance checkup to assess the overall condition of the crawl space and vapor barrier. Inspect all components thoroughly and make any necessary repairs or upgrades.
- Monitor Humidity Levels: Install a humidity monitor or hygrometer in the crawl space to track humidity levels regularly. Keep humidity levels below 60% to prevent mold growth and moisture-related issues.
- Professional Inspection: Consider hiring a professional contractor or inspector to conduct a comprehensive evaluation of the crawl space and vapor barrier system periodically. They can identify potential problems and provide recommendations for maintenance or repairs.
Conclusion
Installing a crawl space vapor barrier is a proactive measure that safeguards your home from moisture damage and maintains indoor air quality. By controlling moisture intrusion, the vapor barrier reduces the risk of mold growth, wood rot, and structural damage, thus preserving the integrity of your home's foundation and structural components.
Additionally, maintaining optimal humidity levels enhances indoor air quality by minimizing the circulation of airborne mold spores and allergens. This not only promotes a healthier living environment but also contributes to long-term savings by reducing the need for costly repairs and improving energy efficiency.
Whether you're installing a vapor barrier for the first time or conducting regular maintenance, prioritizing moisture control is essential for protecting your home and ensuring the well-being of its occupants. Take proactive steps to safeguard your investment and enjoy a safe, comfortable living space for years to come.
FAQS
ABOUT THE AUTHOR

Dennis Shirshikov is an industry expert in home improvement, renovation, and design. His multifaceted background spans various prominent roles in the real estate and property tech industries. With over a decade of experience and more than 1,000 published articles, he excels at delivering insightful, authoritative content in an engaging and accessible manner. He is a partner at the growth consulting firm growthlimit.com
crawlspace services
Sign up to be notified of services in your area.
Protect your crawl space from outside air and defend your home from moisture, pests, allergens and higher electric bills.
Sign Up
Transferable
Warranty
National
Reputation
Local
Expertise

Why Us?
We actually care.
House Repair Quotes was built with the desire to help everyday people get the best deals possible without the hassle of obtaining multiple quotes. We source the best deals so you don’t have to.
Reputable
Our partners are proven experts in the home repair industry. Get your project done right the first time.
Local
Get a competitive quote from a local company who will inspect your home’s problem and propose the best solution.
Fast
Start today by entering your zip code and contact info. Help is just a few clicks away!